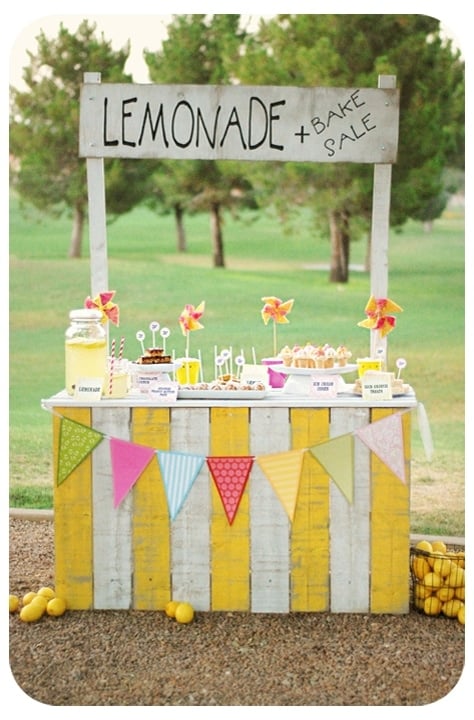
Showing posts with label lemonade stand. Show all posts

Tuesday, May 8, 2012

Pretty Perfect Party Feature

I was so excited yesterday when my lemonade stand was featured on Amy Atlas.  My kids and I had planned on having this during spring break but Mother Nature had other ideas.  We were rained out for a few day and I ended up missing the blog post I had originally scheduled.  But when life gives you lemons....

So see, everything turned out for the best.  Do you recognize the stand from Charlotte's Apple of My Eye Party?  Best part of the lemonade stand- all of these item were store bought and I just fancied them up. (I took pink sprinkles to my local donut store and the made the all pink sprinkle donuts for me.) I love the pink, yellow and white color scheme!
If you would like the banner, I am happy to send it to you if you 

1. Are a follower of Bloom (Sign up now, if you're not already one, on the right side bar).
2. Leave me a comment with your email on this blog- (not pinterest or Facebook- sorry it is too hard to keep track of who received it)

I would also appreciate it if you
Like me on Facebook. If you already like me, share this giveaway.
Follow me on Pinterest.

A thousand thanks to Amy, Lisa and the entire AAE team for featuring the stand!
XO,
Jenny

Tuesday, April 10, 2012

Strawberry Lemonade Party


I am so excited to share this adorable Strawberry Lemonade Party with you. It was styled by Kristina of Modern Frills, one of our new sponsors.  Modern Frills makes adorable custom, personalized tees with a modern twist.  They have many styles and designs to choose from so I'm sure you will find the perfect shirts for all you party needs. Modern Frills is currently hosting a giveaway.  Hop on over and enter.


Kristina hosted this party for her daughter's 5th birthday.  The theme was inspired by the birthday girl's beverage of choice.  I just love the the dessert table- tons detail but very clean and uncluttered.  Kristina's layout takes advantage of the white spaces to keep the design crisp.  The bright red, turquoise and touches of yellow are a fresh, modern take on a lemonade color scheme, while the paper strawberry baskets and wooden crate used for a riser add just the perfect amount of vintage to this lemonade inspired party.
All the more reason to finish your lemonade stands from yesterday's Make It Monday!

Did you notice the adorable mini bunting on the crate.  It is also available at Modern Frills. For vendor credits and more information on this party click here.

Another give away tomorrow! "See" you then.
XO
Jenny


Monday, April 9, 2012

Make It Monday- Lemonade Stand


Happy Monday- I spent last week at the beach playing with my family. I can't wait for summer and the warm southern California weather to kick in.  So, it's lemonade week on Bloom and what better way to start things off than with an amazing lemonade stand tutorial.  Before you click off thinking that it will take forever, I want you to know that this stand took me less than 2 hours to build.

When I was looking for a farm stand for Charlotte's birthday party, I found this adorable photo on Pinterest.  It took me to Lil Luna and I've been a fan ever since.  I've emailed with the lady behind Lil Luna, Kristyn,  a handful of times and she is an incredibly sweet, down to earth, adorable person- a new friend.  You will love her blog!

Lil\'Luna

So, I followed most of Lil Luna's directions for a lemonade stand, which you can find by clicking here but I made a few changes that suited my party a bit better.  My secrets-
1.  I  didn't need to antique my stand since that wasn't the look of my party.  The crisp hot pink and white worked great.
2. I had all the wood cut at Home Depot when I bought it.  They will do this for free.  I took in all the measurements with me and they did the real work.  When I got home, all I really had to do was paint the boards (with a big roller) and screw the pieces together.  This step requires a bit of preplanning and math but it saved me soooooo much time.
3. My stand is obviously longer than Lil Luna's.  Decide on the length you want.  Adjust the length of the front 2x4s and increase the amount of planks that you need.
4. I did not use glue, or counter sink or make corner brackets- I'm sure Lil Luna's stand will last much longer than mine.  I did use drywall screw to attach everything.
5. I simply screwed the posts for the sign into the back 2x4 eliminating the need to make slits for the post.  My skills are not at that level:)
6. Like Lil Luna, I had a vinyl decal made for the lettering.  You could easily hand paint it but I am much too impatient. Maybe someday.

Add the adorable party bunting we made last week:) and let the kids have fun!

Now that the Apple of Our Eye Party is over, my kiddos have new plans for the stand.  We are repainting and using it for a future project.  Concessions anyone? Photos coming soon.  See you tomorrow.
XO,
Jenny